Inserting Multiple Calculation Areas
This section teaches you how to insert and group multiple calculation areas.
-
Use the standard CAD ERASE command to erase the calculation area boundary on your drawing.
-
Run the Insert Calculation Area command. The Insert Calculation Area dialog box will open.
Ribbon: DM Photometrics→Calculation Areas→ Insert Calculation Area
Pulldown Menu: DM Photometrics→Insert Calculation Area -
Make sure the ☐ Override Schedule Title box and ☐ Calculate Vertical Illuminance Levels At Area Boundary box are not checked, Grid Spacing is set to 10, and Calculation Elevation is set to 0.

-
Press the button.
-
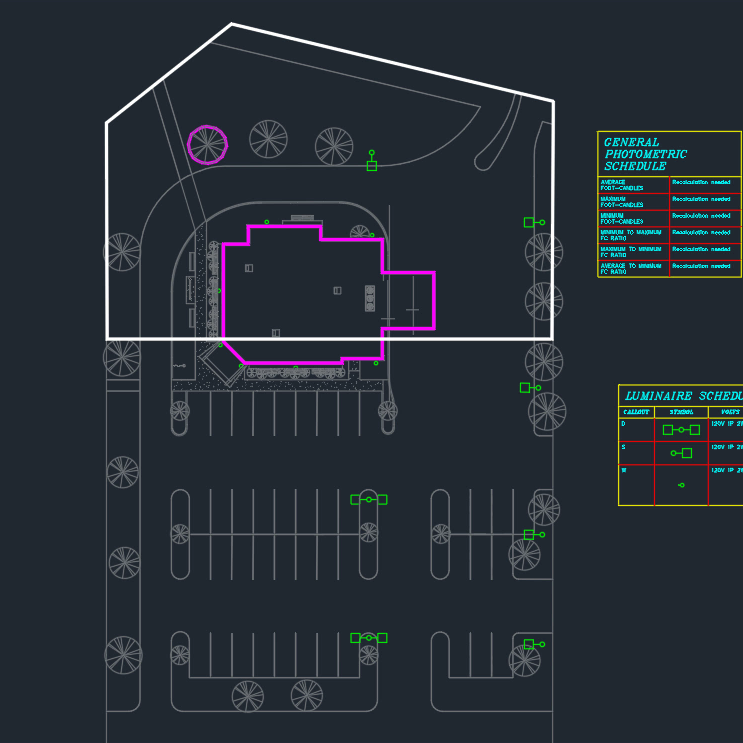
Insert the boundary on the top half of the parking lot as shown below. Insert the schedule for the area to the right.
Inserting an Additional Area Linked to Another Area
-
Run the Insert Calculation Area command. The Insert Calculation Area dialog box will open.
Ribbon: DM Photometrics→Calculation Areas→ Insert Calculation Area
Pulldown Menu: DM Photometrics→Insert Calculation Area -
Set Grid Spacing to 5.
-
Press the button.
-
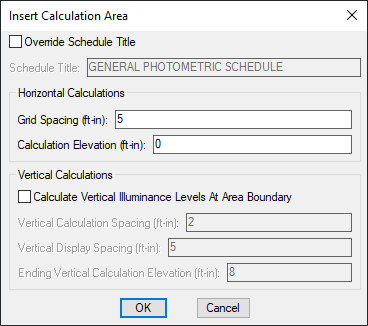
Insert the boundary below the first boundary you inserted as shown below. When you are prompted to insert the schedule, select a point inside the first boundary you inserted.
The newly inserted area and the first area will be grouped together. The values in the calculation schedule will be based upon the illuminance levels in both areas.
- Run the Calculate command to see the changes in the illuminance levels. Leave the settings as they are and press the button.
Ribbon: DM Photometrics→Calculate→
 Calculate
Pulldown Menu: DM Photometrics→Calculate
Inserting an Additional Area with a Separate Schedule
-
Run the Insert Calculation Area command. The Insert Calculation Area dialog box will open.
Ribbon: DM Photometrics→Calculation Areas→ Insert Calculation Area
Pulldown Menu: DM Photometrics→Insert Calculation Area -
Set Grid Spacing to 10.
-
Press the button.
-
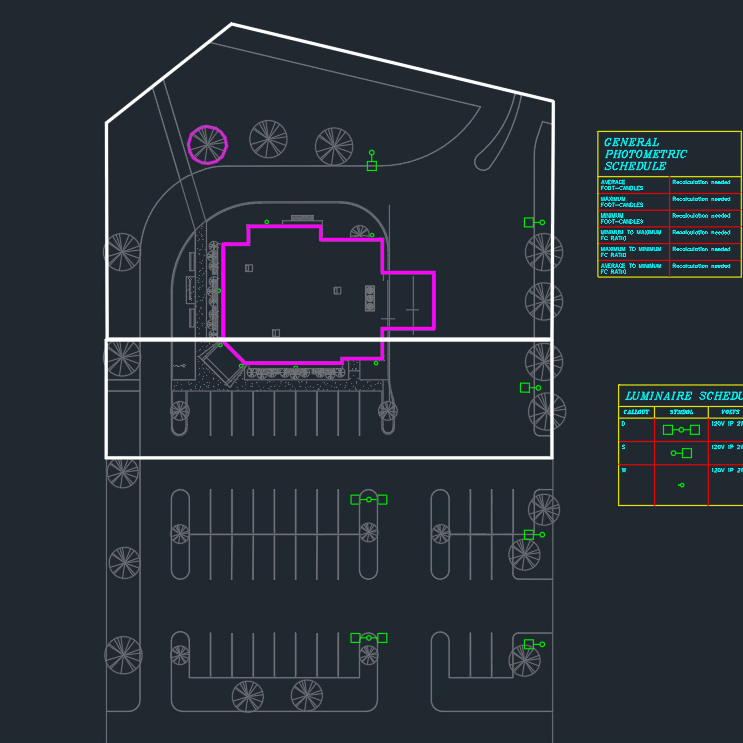
Insert the boundary on the bottom half of the parking lot as shown below. Insert the schedule for the area to the right.
The values in the calculation schedule on top will be based upon the illuminance levels in the top two areas. The values in the calculation schedule on bottom will be based upon the illuminance levels in the bottom area.
-
Run the Calculate command to see the changes in the illuminance levels. Leave the settings as they are and press the button. Ribbon: DM Photometrics→Calculate→
Calculate
Pulldown Menu: DM Photometrics→Calculate -
You will be prompted to specify which area to calculate. Specify a point inside the bottom area.
The illuminance levels in the bottom area will be calculated. The illuminance levels in the upper two areas will not be calculated.
Linking an Area with Another Area
-
Run the Add Calculation Area to Group command.
Ribbon: DM Photometrics→Calculation Areas→ Add to Group
Pulldown Menu: DM Photometrics→Add Calculation Area to Group -
You will be prompted to specify a point inside an area. Specify a point inside one of the top two areas.
-
You will then be prompted to specify a point inside another area to group with the first area. Specify a point inside the bottom area.
The bottom calculation schedule will be erased. The bottom area is now grouped with the top two areas. The values in the remaining calculation schedule will be based upon the illuminance levels in all three areas.
- Run the Calculate command to see the changes in the illuminance levels. Leave the settings as they are and press the button.
Ribbon: DM Photometrics→Calculate→ Calculate
Pulldown Menu: DM Photometrics→Calculate
There is now only one group on the drawing, so you will not be prompted to select which area to calculate. All three areas will be calculated and the calculation schedule updated.
Remove Link between Areas
-
Run the Remove Calculation Area from Group command.
Ribbon: DM Photometrics→Calculation Areas→ Remove from Group
Pulldown Menu: DM Photometrics→Remove Calculation Area from Group
Remove from Group
Pulldown Menu: DM Photometrics→Remove Calculation Area from Group -
You will be prompted to specify a point inside an area to remove from a group. Specify a point inside the middle area.
-
Next, you will be prompted to insert the calculation schedule for the area. Insert it to the right of the area.
-
Run the Calculate command to see the changes in the illuminance levels. Leave the settings as they are and press the button.
Ribbon: DM Photometrics→Calculate→ Calculate
Pulldown Menu: DM Photometrics→Calculate -
You will be prompted to specify which area to calculate. Specify a point inside the top area. The illuminance levels in the top and bottom areas will be calculated. The illuminance levels in the middle area will not be calculated.
-
Run the Calculate command again. Leave the settings as they are and press the button.
Ribbon: DM Photometrics→Calculate→ Calculate
Pulldown Menu: DM Photometrics→Calculate -
You will be prompted to specify which area to calculate. Press ENTER. The illuminance levels will be calculated in all areas on the drawing and all of the calculation schedules will be updated.