Inserting a Light Fixture Schedule
This section teaches you how to insert and modify a light fixture schedule on your drawing.
-
Run the Insert Light Fixture Project Schedule command. The Insert Light Fixture Project Schedule dialog box will open.
Ribbon: DM Photometrics→Schedule→ Insert Light Fixture Project Schedule
Pulldown Menu: DM Photometrics→Insert Light Fixture Project Schedule -
Make sure ☐ Zoom to Schedule After Insertion is not checked.

-
Press the button.
-
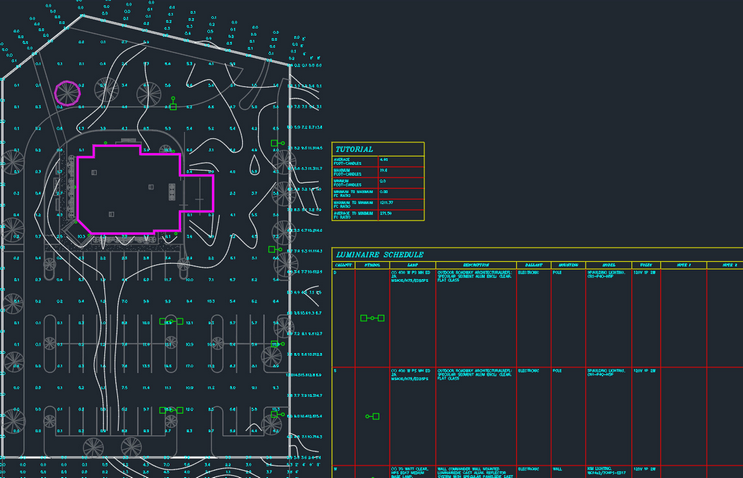
You will be prompted to specify the insertion point for the light fixture schedule. Select a point below the calculation area schedule as shown below.
Modifying a Light Fixture Schedule
The schedule can be customized to display the information you need.
-
Run the Insert Light Fixture Project Schedule command. The Insert Light Fixture Project Schedule dialog box will open.
Ribbon: DM Photometrics→Schedule→ Insert Light Fixture Project Schedule
Pulldown Menu: DM Photometrics→Insert Light Fixture Project Schedule -
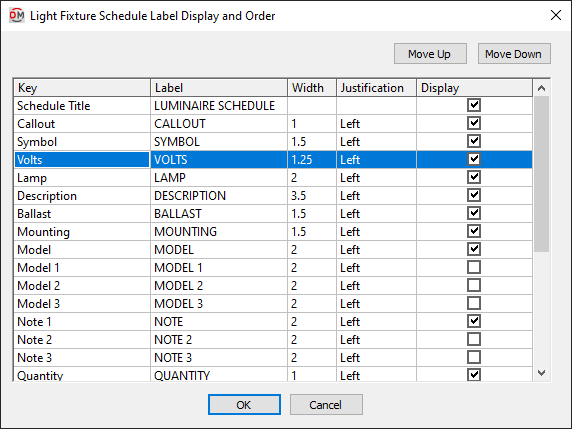
Press the button. The Light Fixture Schedule Label Display and Order dialog box will open.
-
Uncheck the boxes in the ☐ Display column for the Note 2 and Note 3 rows.
-
In the Note 1 row, change the Label column value to NOTE.
-
Select the Volts row and press the button until it is below the Symbol row.
-
Press the button.
-
Press the button again in the Insert Light Fixture Project Schedule dialog box.
The light fixture schedule on the drawing will update with the customized columns and labels.