Creating Light Fixtures
This section teaches you how to create light fixture types in your schedule.
Each project contains a light fixture schedule. When you insert a light fixture on your drawing, you must choose a type from your schedule. Before you can insert a light fixture, you must first define at least one type in your schedule.
Create Wall-Mounted Light Fixture W
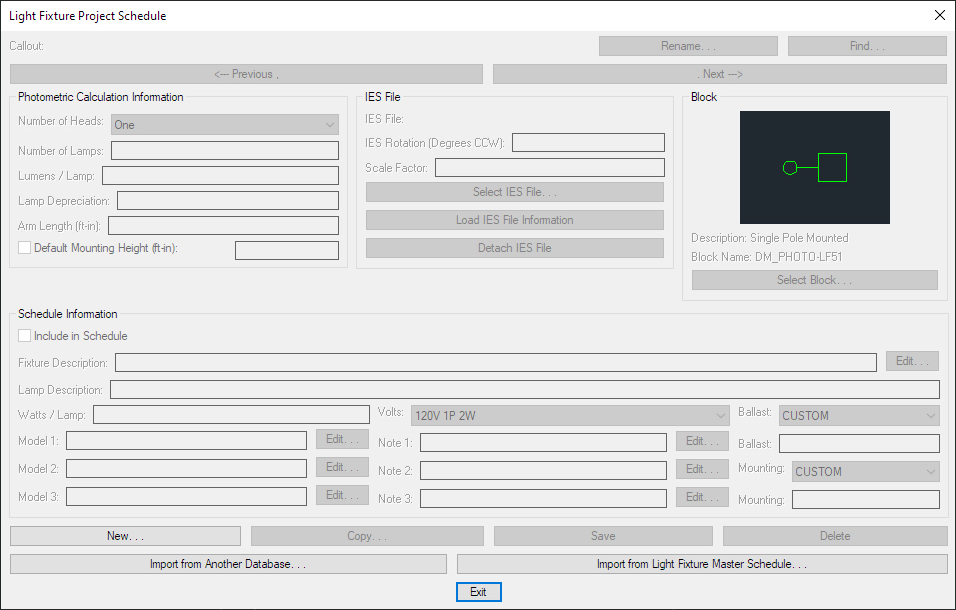
- Run the Light Fixture Project Schedule command. The Light Fixture Project Schedule dialog box will open.
Ribbon: DM Photometrics→Schedule→ Light Fixture Project Schedule
Pulldown Menu: DM Photometrics→Light Fixture Project Schedule
-
Press the button. The New dialog box will open.
-
Set New Light Fixture Callout to W and press the button. A new light fixture type called W will be created in the schedule. All of the information for the light fixture type will be set to default values.
-
Press the button to change the block that will be displayed on the drawing when you insert this light fixture.
-
Set Light Fixture Description ☰ to Round Wall Mounted (Small).
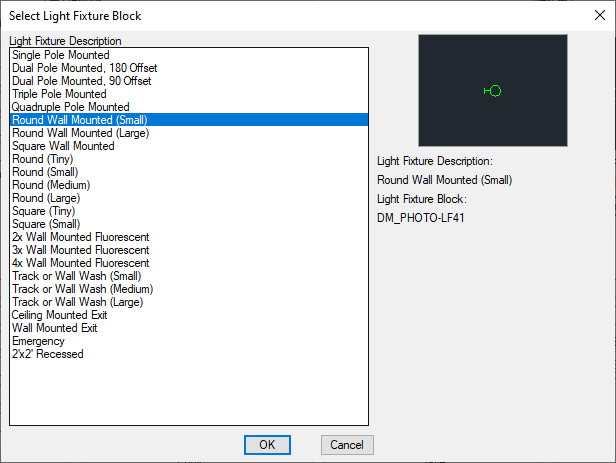
- Press the button.
The graphic displayed in the dialog box and the Description and Block Name labels will be updated.
Next, you will identify the IES file associated with this fixture. The IES file defines the light output for the light fixture. These files are required to calculate the illuminance levels. We have included IES files for use in this project. For future projects, you will need to obtain these from the light fixture manufacturer's website.
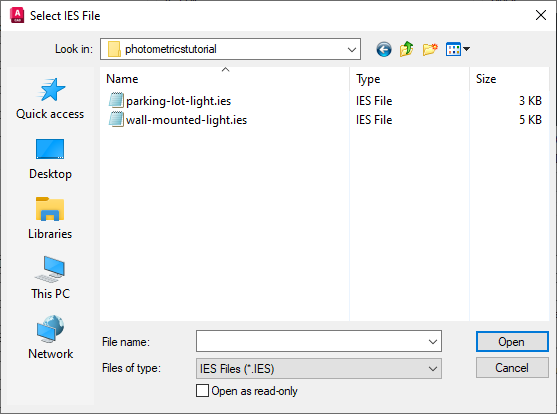
- Press the button. The Select IES File dialog box will open.
-
Select the wall-mounted-light.ies file and press the button. A Design Master Photometrics dialog box will open and ask whether you want to load information from the IES file.
-
Press the button. The IES file will be attached to the light fixture. The photometric calculation information and schedule information will be updated from data stored in the IES file.
noteOnce the information is updated from the IES file, you can edit it manually as needed for your project. If you press the button in the previous dialog box, the IES file will be attached to the light fixture, but the information will not be updated.
-
Set Mounting ▾ to Wall.

- Press the button to save your changes to the database.
Create Pole-Mounted Light Fixture S
-
Press the button and set New Light Fixture Callout to S.
-
Press the button and select the Single Pole Mounted block.
-
Press the button and select the parking-lot-light.ies file.
-
When asked if you want to load the information from the IES file, press the button.
-
Set Arm Length to 3.
-
Set Mounting ▾ to Pole.

- Press the button to save your changes to the database.
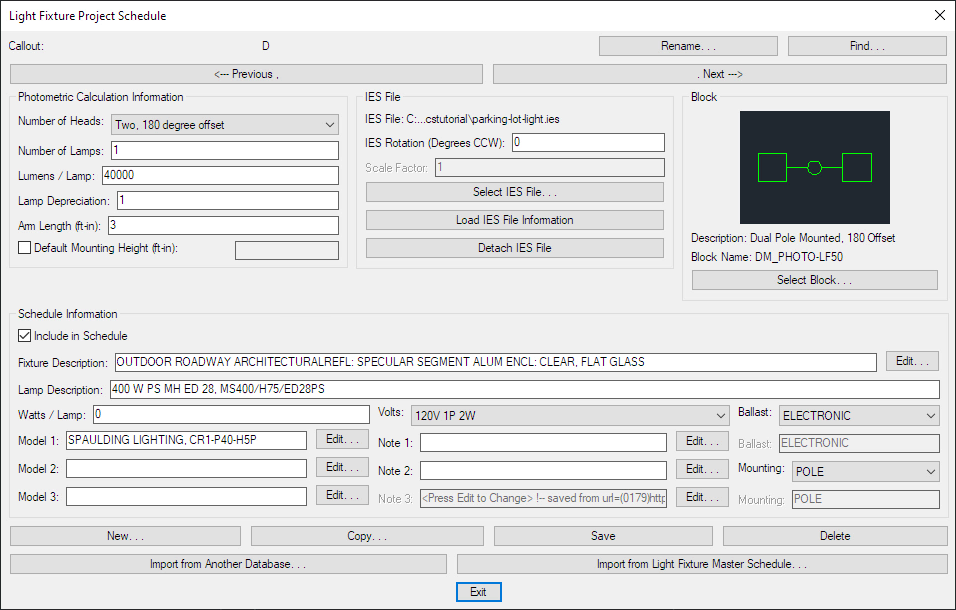
Create Pole-Mounted Light Fixture D
-
Press the button and set New Light Fixture Callout to D.
-
Press the button and select the Dual Pole Mounted, 180 Offset block.
-
Set Number of Heads ▾ to Two, 180 degree offset.
-
Press the button to save your changes to the database.
-
Press the button to close the dialog box.